Let’s see some examples. Most of the example photos were taken at night. There’s no natural light anymore, you have to use extra lights to build the scene.
=======================================================================
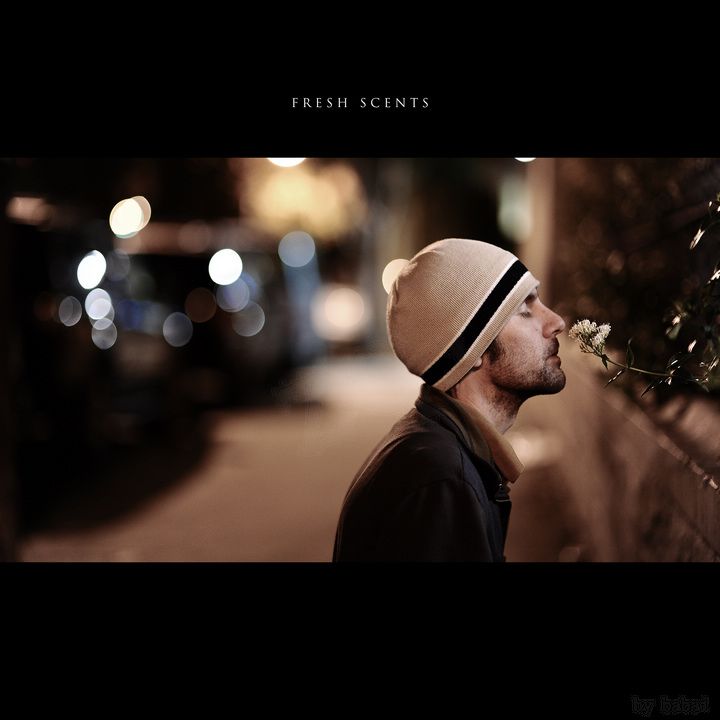
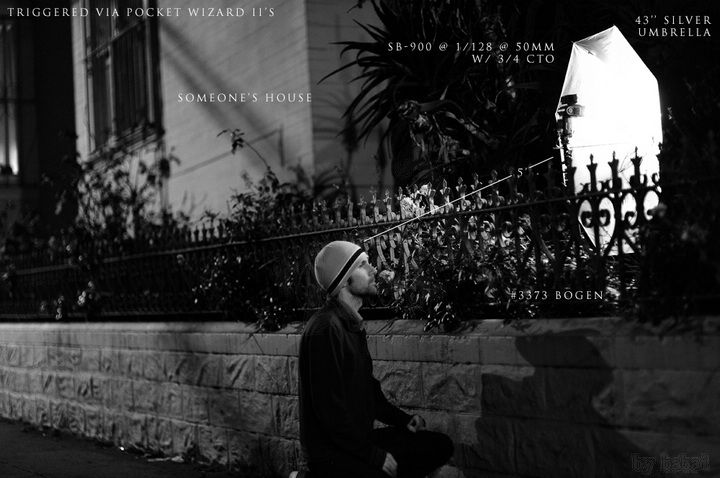
In this photo, the photographer set a flash light that oppose to the model. If the light is straightly to the model’s face, there will be no shadow on his face. In case to make the light softer, the photographer put a silver umbrella reflector in front of the light. Also there are some traffic lights and street lights to brighten the background.
=======================================================================
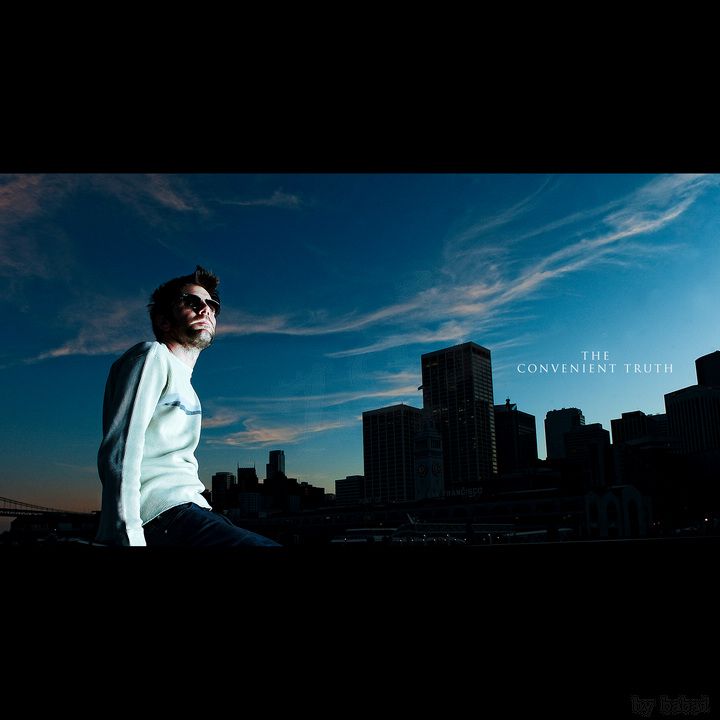
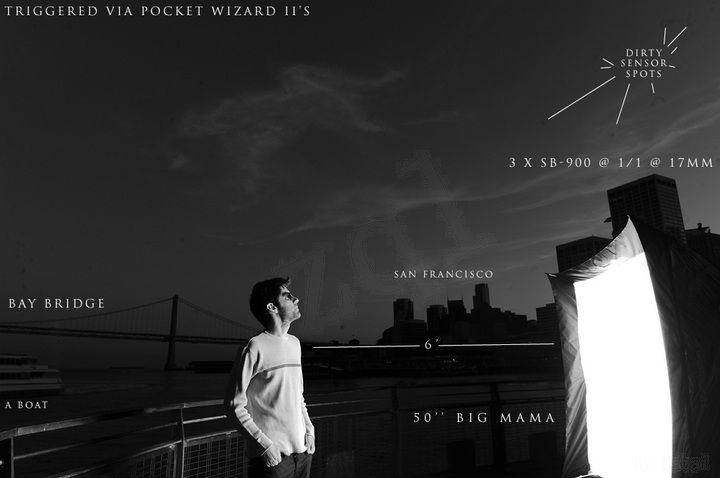
This photo was taken at dusk. The higher background (the sky) is still bright but the lower background (the city) is dark. The photographer set a light with diffuser in the left front of the model. The broader the light source, the softer the light. The narrower the source, the harder the light. A broad light source lessens shadows, reduces contrast, and suppresses texture. A narrow light source does the opposite. This is because, with a broad source, light rays hit your subject from more directions, which tends to fill in shadows and give more even illumination to the scene.
=======================================================================

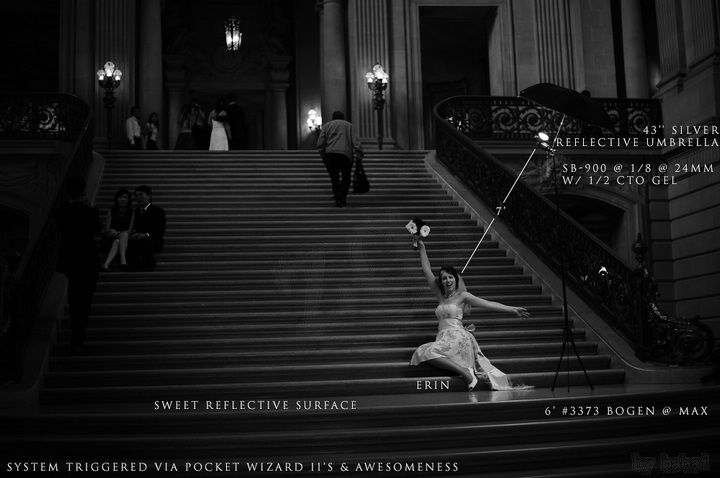
This beautiful bride’s photo only used a small light. But she still looked soft and bright. Like the first example, the photographer uses a oppose flash light and a silver reflective umbrella. That’s because the closer the light source, the softer the light; the farther the source, the harder the light. This stands to reason: Move a light closer, and you make it bigger—that is, broader—in relation to your model. Move it farther away, and you make it relatively smaller and therefore narrower.
So, today I’ve shown you three ways to set
your lights when taking photos in a dark place. Next time, I’ll give you some
examples in a brighter scene! See you(●′ω`●)!

No comments:
Post a Comment